© Original Recipe By Serena’s Delights ©
🍪✨ Chewy Chocolate Thumbprint Cookies: Your Ultimate Easy Fudgy Dessert!
1. Introduction
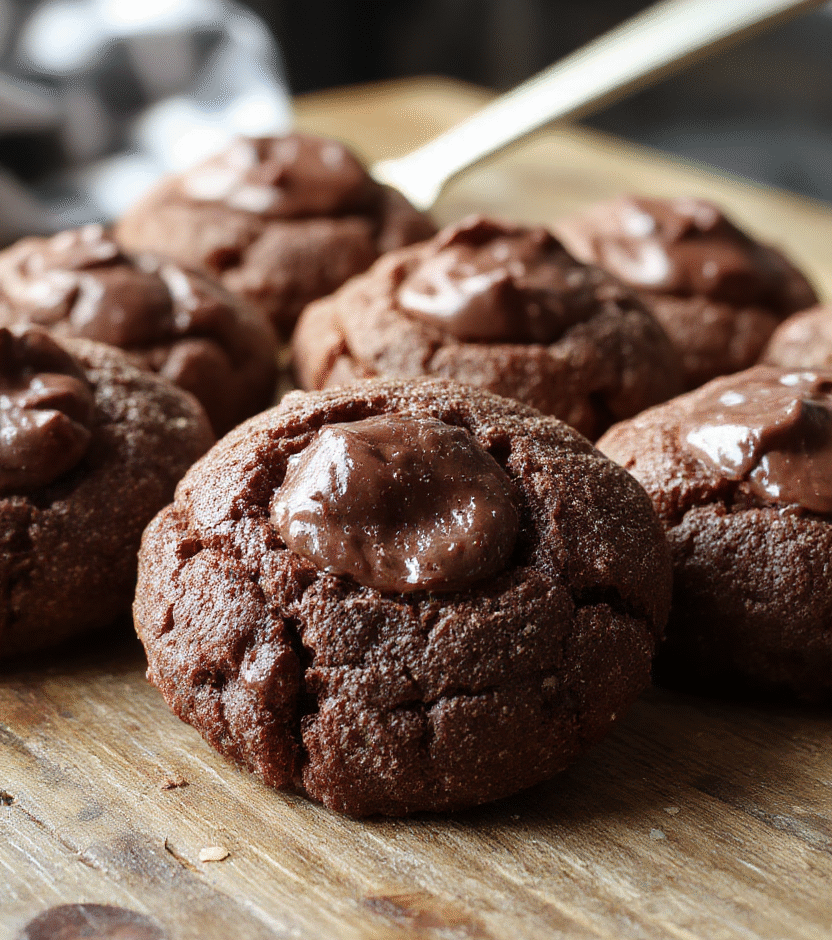
If you’re craving a decadent, fudgy dessert that combines rich chocolate flavor with a delightful chewy texture, these Chocolate Thumbprint Cookies are just what you need. Perfect for satisfying sweet cravings or impressing guests at your next gathering, these cookies boast a tender, fudgy center encased in a crisp, buttery exterior. The thumbprint indentation is filled with luscious chocolate or jam, making every bite a symphony of flavor.
As someone who loves baking and indulging in sweet treats, I can assure you that this recipe is both simple and rewarding. It’s an excellent choice for busy weeknights or holiday celebrations. Let’s explore why these **Fudgy Cookies** are a must-have in your cookie jar!
2. Why You’ll Love This Recipe
- Quick & Easy: Ready in under 30 minutes, perfect for spontaneous sweet cravings.
- Minimal Ingredients: Just a handful of pantry staples for rich flavor and chewy texture.
- Versatile Filling: Use melted chocolate, fruit preserves, or caramel to customize each thumbprint.
- Perfect for Sharing: Makes about 12-15 cookies, ideal for gifting or potlucks.
- Deliciously Fudgy & Chewy: A cookie texture that melts in your mouth with each bite.
3. Ingredient Notes
For the best results, select high-quality ingredients. Unsweetened cocoa powder, like Breville Nespresso Vertuo Creatista Espresso & Coffee Maker (or any good cocoa powder), provides a rich, chocolatey depth. Use fresh, soft butter for a tender crumb, and good-quality chocolate chips or jam for the filling, depending on your preference. If substituting sugar, feel free to experiment with natural sweeteners like honey or maple syrup, but note that it may alter the texture slightly.
For an even more elevated flavor, you might incorporate a hint of vanilla extract or a pinch of salt to balance the sweetness. Remember, the key to chewy cookies is not over-baking; aim for a slightly underdone center for that perfect fudgy inside.
4. Kitchen Tools You Need
To craft these chewy chocolate thumbprint cookies with ease, a few key kitchen tools are essential:
- Compact 6-in-1 Digital Air Fryer: This multi-use appliance helps in baking cookies evenly and quickly, especially if you don’t have an oven.
- T-fal 14-Piece Hard Anodized Nonstick Cookware Set: Ensures your baking pans release cookies effortlessly, making cleanup a breeze.
- Ninja Foodi Smart XL Indoor Grill & Air Fryer Combo: An alternative to traditional baking if you want to experiment using a countertop appliance.
- KitchenAid Artisan 5-Quart Stand Mixer in Scorched Orange: Perfect for mixing the dough to a silky smooth consistency effortlessly.
5. How to Make Chewy Chocolate Thumbprint Cookies
Prepare Your Ingredients and Oven
Start by preheating your oven to 350°F (175°C). Gather your ingredients and line a baking sheet with parchment paper for easy cleanup. The smell of melting butter and cocoa will set the mood for baking magic.
Mix the Dough
In a large bowl, beat together softened butter and sugar until creamy. Add an egg and vanilla extract, mixing until smooth. Gradually incorporate cocoa powder, flour, baking powder, and a pinch of salt. The dough should be fudgy but pliable, and if it’s too sticky, chill it for 15 minutes.
Form the Cookies
Use a cookie scoop or your hands to shape about 1-1.5 inch balls. Place them on the prepared baking sheet, leaving space for spreading. Using your thumb or the back of a small spoon, create an indent in the center of each cookie. It’ll look like a little cup ready to be filled.
Bake and Fill
Bake for 8-10 minutes, until the edges are set but the centers look soft. As soon as they come out of the oven, gently re-indent the centers if they’ve puffed up. Fill each with melted chocolate, fruit preserves, or caramel while warm. Allow them to cool slightly before transferring to a wire rack.
6. Expert Tips for Success
- Chill the dough: Giving the dough a quick chill helps prevent spreading during baking, ensuring thick, chewy cookies.
- Avoid overbaking: Cookies continue to cook slightly after removal, so take them out when they’re just set around the edges.
- Customize fillings: Experiment with different fillings like peanut butter or dulce de leche for variety.
- Use quality chocolate: Melted high-quality chocolate gives an ultra-rich flavor and glossy finish.
7. Variations & Substitutions
If you prefer vegan or gluten-free options, substitute dairy butter with coconut oil or vegan butter, and use gluten-free flour blends. For a nutty twist, add chopped walnuts or pecans into the dough. Want a more festive theme? Tint the filling with food coloring or drizzle with white chocolate.
8. Storage & Reheating
Store these cookies in an airtight container at room temperature for up to 3 days or in the refrigerator for a week. To refresh the fudgy centers, gently warm in an oven or microwave saying 10-15 seconds. For best flavor, serve slightly warm or at room temperature.
9. FAQ
Can I freeze these cookies?
Yes, you can freeze the baked cookies for up to a month. Wrap them tightly in plastic wrap and store in a freezer-safe container. Thaw at room temperature before filling with chocolate or jam.
What’s the best filling for thumbprint cookies?
Classic choices include fruit preserves, Nutella, or melted chocolate. Feel free to mix and match to suit your taste preferences!
How do I get the perfect chewy texture?
Ensure not to overbake; remove cookies when edges are just set. Using slightly underripe, softer butter can also contribute to chewier results.
10. Conclusion
In just a few simple steps, you can create these irresistibly chewy, fudgy Chocolate Thumbprint Cookies. They’re a decadent yet approachable treat that elevates any dessert platter. Whether you’re baking for a special occasion or need a quick sweet fix, these cookies promise maximum flavor with minimal effort. Happy baking!
Print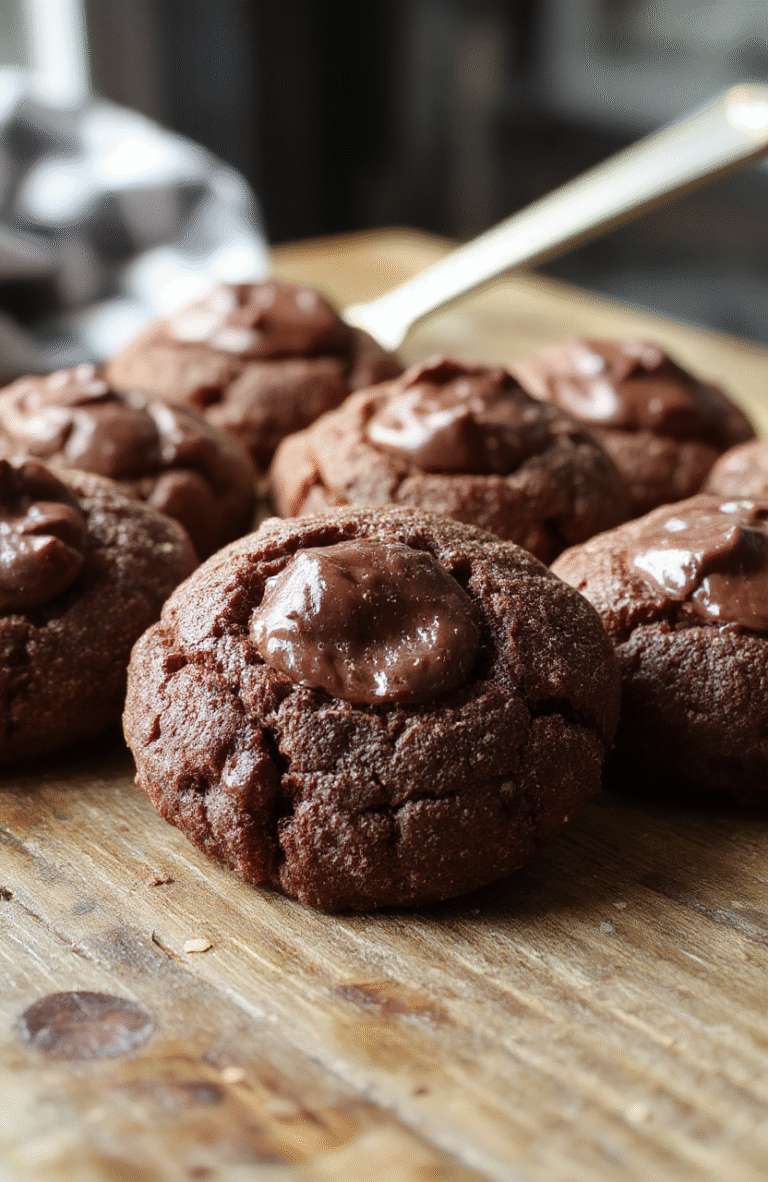
Chewy Chocolate Thumbprint Cookies Easy Fudgy Dessert
Soft, chewy chocolate thumbprint cookies with a rich, fudgy filling. Perfect for a quick, indulgent treat or special occasion.
- Total Time: 27 minutes
- Yield: 24 cookies 1x
Ingredients
- 1 cup unsalted butter, softened
- 1 cup granulated sugar
- 2 large eggs
- 2 teaspoons vanilla extract
- 2 cups all-purpose flour
- 1/2 cup unsweetened cocoa powder
- 1/2 teaspoon salt
- 1/2 teaspoon baking powder
- 1 cup chocolate ganache or chocolate spread
Instructions
- Preheat oven to 350°F (175°C). Line baking sheets with parchment paper.
- In a bowl, cream together butter and sugar until fluffy.
- Add eggs one at a time, then vanilla, mixing well.
- In a separate bowl, whisk together flour, cocoa powder, salt, and baking powder.
- Gradually add dry ingredients to wet mixture until combined.
- Roll dough into 1-inch balls and place on prepared baking sheet.
- Bake for 10-12 minutes, then remove and let cool slightly.
- Use your thumb to create an indentation in each cookie, then fill with chocolate ganache.
- Allow ganache to set before serving.
Notes
- Ensure butter is softened for smooth mixing.
- Chill dough if too soft to handle.
- Replace ganache with chocolate spread for quicker filling.
- Prep Time: 15 minutes
- Cook Time: 12 minutes
- Method: Baking
- Cuisine: American
- Diet: Vegetarian
Nutrition
- Serving Size: 1 cookie
- Calories: 150 Kcal
- Sugar: 10g
- Sodium: 40mg
- Fat: 9g
- Saturated Fat: 5g
- Unsaturated Fat: 4g
- Trans Fat: 0g
- Carbohydrates: 15g
- Fiber: 2g
- Protein: 2g
- Cholesterol: 30mg